
Managing the Request Inbox
The Request Inbox is where your community’s request team works every request residents send. Go to Requests → Inbox.
Find a request
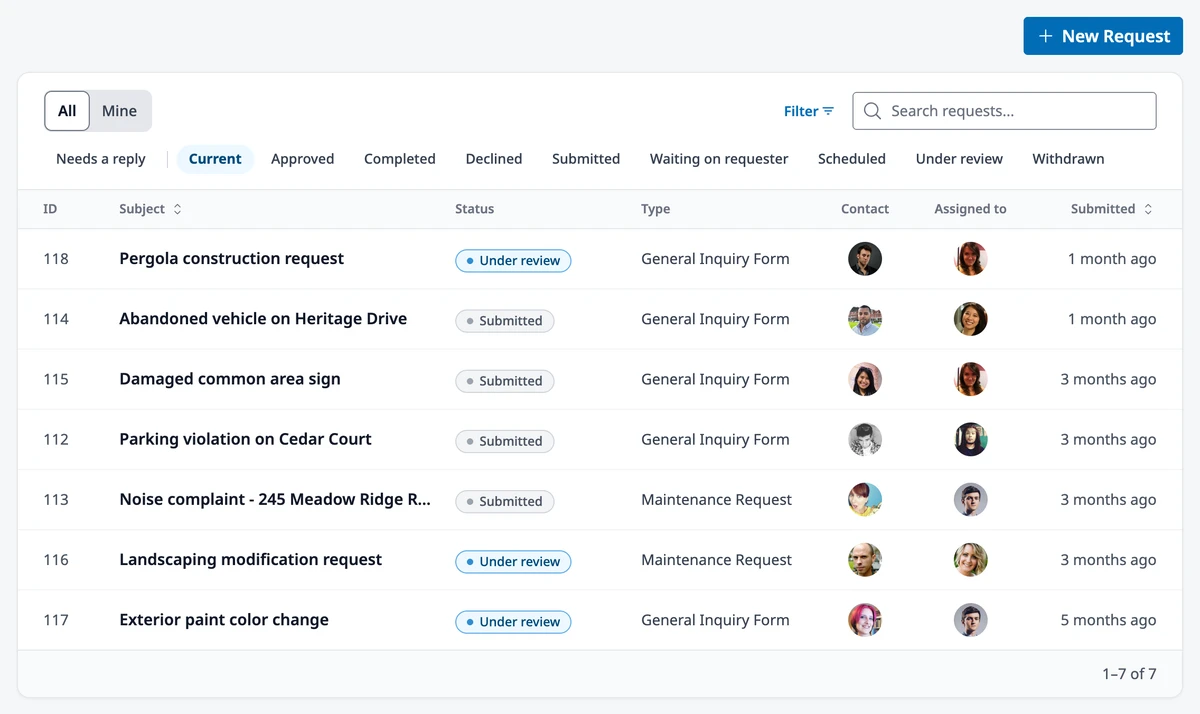
Section titled “Find a request”The status chips across the top filter the list. Current, selected when you arrive, shows requests that are Submitted, Under review, or Scheduled; pick any other status to see those instead. Needs a reply narrows the list to open requests where the requester wrote last, or where no one on the team has answered yet.
Switch All to Mine to see only the requests assigned to you. Search finds words in subjects and descriptions, and Filter narrows by Request Type, Month submitted, Assigned to, and Properties.
If your community limits some forms to selected roles, you see only the requests on forms open to your role. See Choosing Who Sees a Form’s Requests.
File a request for someone
Section titled “File a request for someone”When a resident calls or stops by instead of filing a request, click New Request, pick the form, and choose the resident under Contact. Leave Contact empty to file the request for yourself. The form list offers only forms you can see.
Work a request
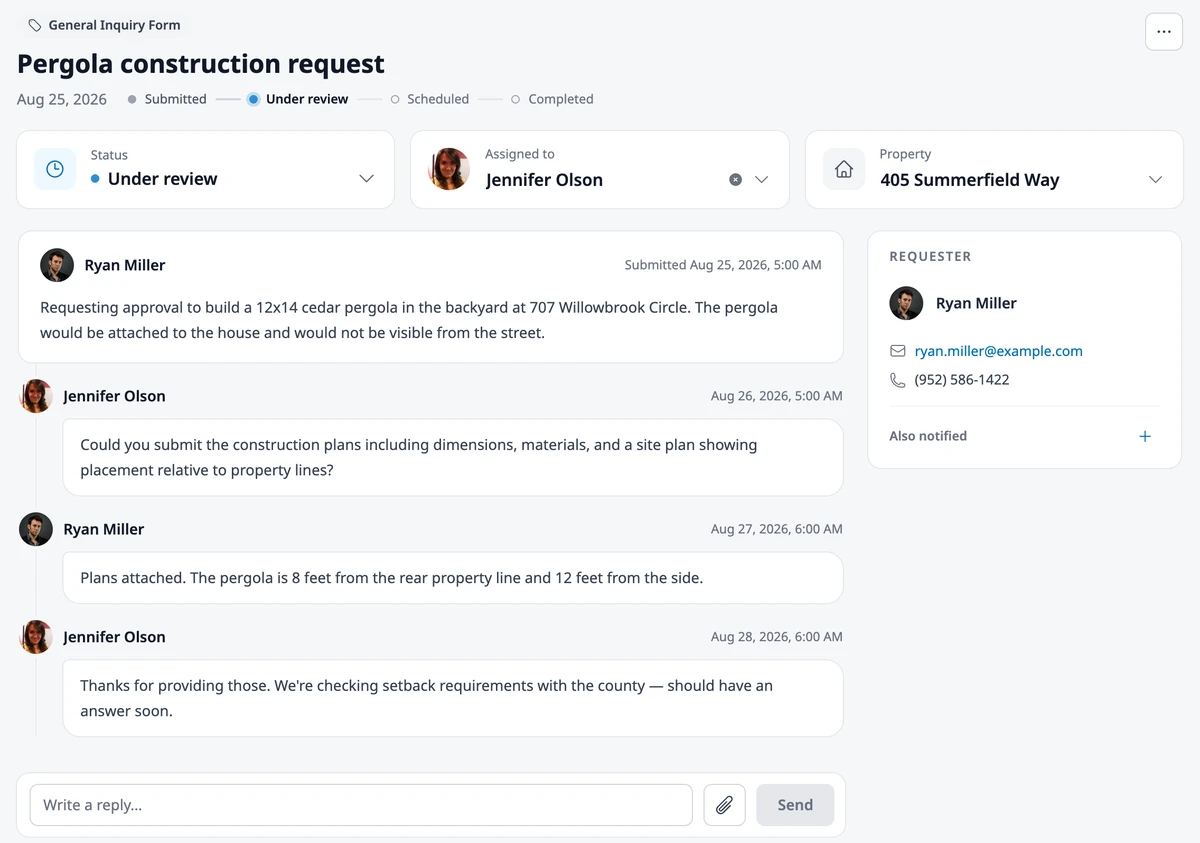
Section titled “Work a request”Click a request to open it. The top shows its form, subject, submitted date, and steps. At the side:
- Status — pick the next step, Waiting on and the requester’s name when you need their answer, or Approved or Declined on a form that needs approval
- Assigned to — the team member responsible. Pick yourself with Assign to me. The person you assign gets an email. Only team members who can see the request are listed.
- Property — the properties the request concerns
- Requester — the person who filed it, with their email and phone. Add people under Also notified to send them the same emails the requester gets. Other requests lists the requester’s recent requests.
Changes save as you make them.
Reply or add an internal note
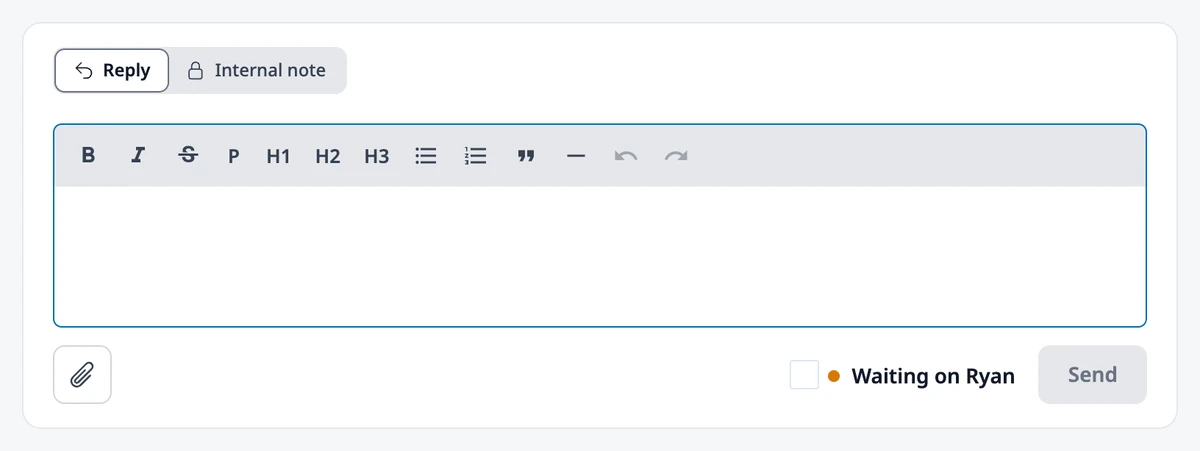
Section titled “Reply or add an internal note”Pick Reply or Internal note above the message box. A reply goes to the requester and everyone under Also notified, by email. An internal note has an Internal note label, is seen by the team only, and sends no email. Click the paperclip to attach files, up to 20 at a time and 10 MB in total.
On a Submitted or Under review request, tick Waiting on and the requester’s name before you click Send to ask a question and change the status in one step. The requester gets a single email.
When the requester answers, the request goes back to Under review on its own.
Close and reopen a request
Section titled “Close and reopen a request”Pick Completed, or Approved or Declined on a form that needs approval. The requester is emailed right away and can no longer reply; you can still add internal notes.
To pick it up again, click Reopen. The request goes back to Under review. If the person assigned to it can no longer see requests on its form, they are unassigned.
See the history
Section titled “See the history”Open the ⋯ menu and choose History to see every status change, assignment, and message, with who made it and when.
Record a variance
Section titled “Record a variance”On an approved request linked to a property, Record variance creates a property variance from the request. See Managing Variances.
Where to go next
Section titled “Where to go next”- Need the meaning of a status, or who gets emailed? See Understanding Requests.
- Changing what residents fill in? See Creating Request Forms.
- Keeping a form’s requests to a committee? See Choosing Who Sees a Form’s Requests.