
Connecting Stripe / Online Payments
HOA Hub works completely without a payment processor connected — see Understanding Billing. When your board is ready to accept card or bank payments online, connecting Stripe adds that on top, without changing anything about how manual billing already works.
Enable online payments
Section titled “Enable online payments”Go to Billing → Dashboard and click Set up next to Online payments. You’ll be guided through creating a secure Stripe account for your community — HOA Hub walks you through account creation, identity verification, and payout setup. You don’t need to know anything about Stripe going in.
If you start onboarding but don’t finish, Online payments shows Setup incomplete with a Continue setup button to pick up where you left off. Once Stripe confirms your account can accept charges, it shows On. Click Manage next to it to open the Billing Settings page, where the Payment Processing card shows Connected.
Convenience fees
Section titled “Convenience fees”Once connected, the Payment Processing card on the Billing Settings page shows a Transaction fee pass-through switch; see Setting Up Billing to open the page. It saves as soon as you switch it, and Billing Managers can change it too.
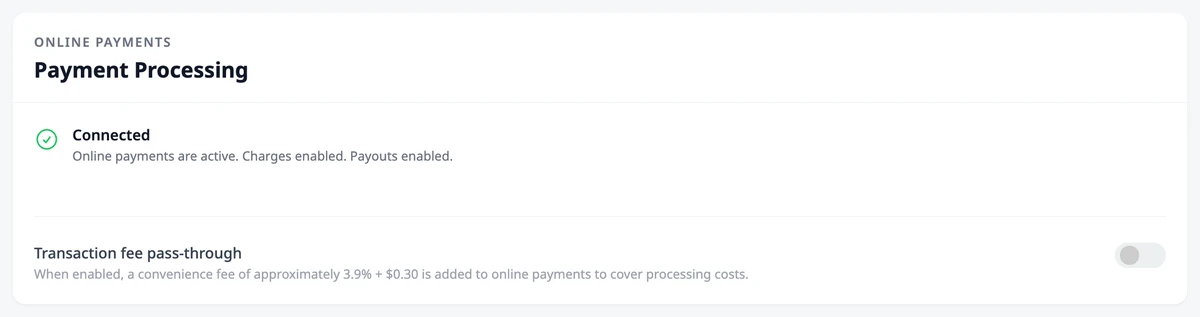
When it’s on, every online payment adds a convenience fee of 3.9% of the invoice balance plus $0.30, so residents — not your community — cover the processing cost. The same fee applies to card and bank (ACH) payments, and to autopay. Residents see this fee broken out before confirming any online payment.
What residents can do once Stripe is connected
Section titled “What residents can do once Stripe is connected”- Pay any open invoice online by card or ACH — see Paying Your Assessments
- Enroll in autopay so invoices are charged automatically on their due date
- Save and manage their own payment methods
Where to go next
Section titled “Where to go next”- Want to see the resident side of this? See Paying Your Assessments.
- Configuring the rest of your billing settings? See Setting up billing.