
Managing the Directory
Admins keep the community’s contact records up to date from the Directory page and each contact’s page. Board Members can open contact pages and add notes, but can’t change the contact itself.
Add a contact
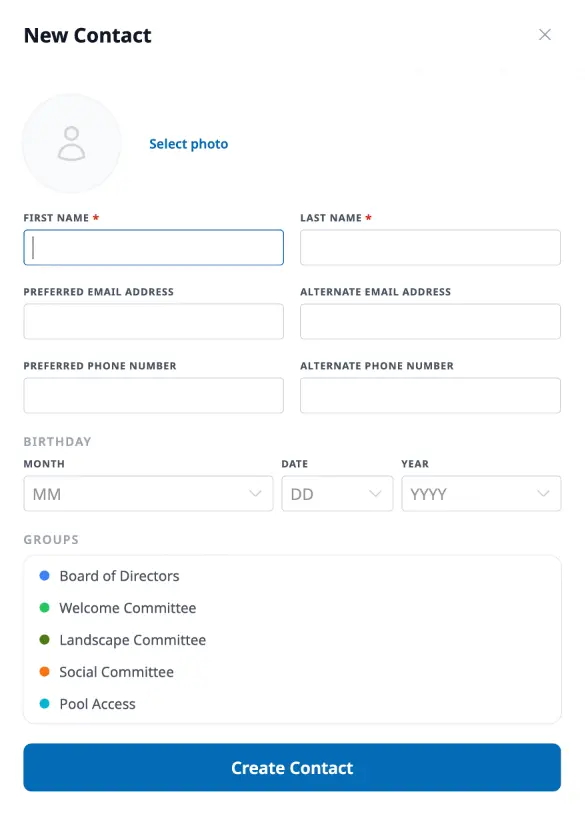
Section titled “Add a contact”On the People tab of the Directory, click New Contact. A drawer opens for the person’s photo, name, email addresses, phone numbers, birthday, and groups. First and last name are required; you can fill in the rest later. Click Create Contact to save.
The contact page
Section titled “The contact page”Click a name in the Directory to open the contact’s page. Residents get a short contact card instead; see Finding Your Neighbors.
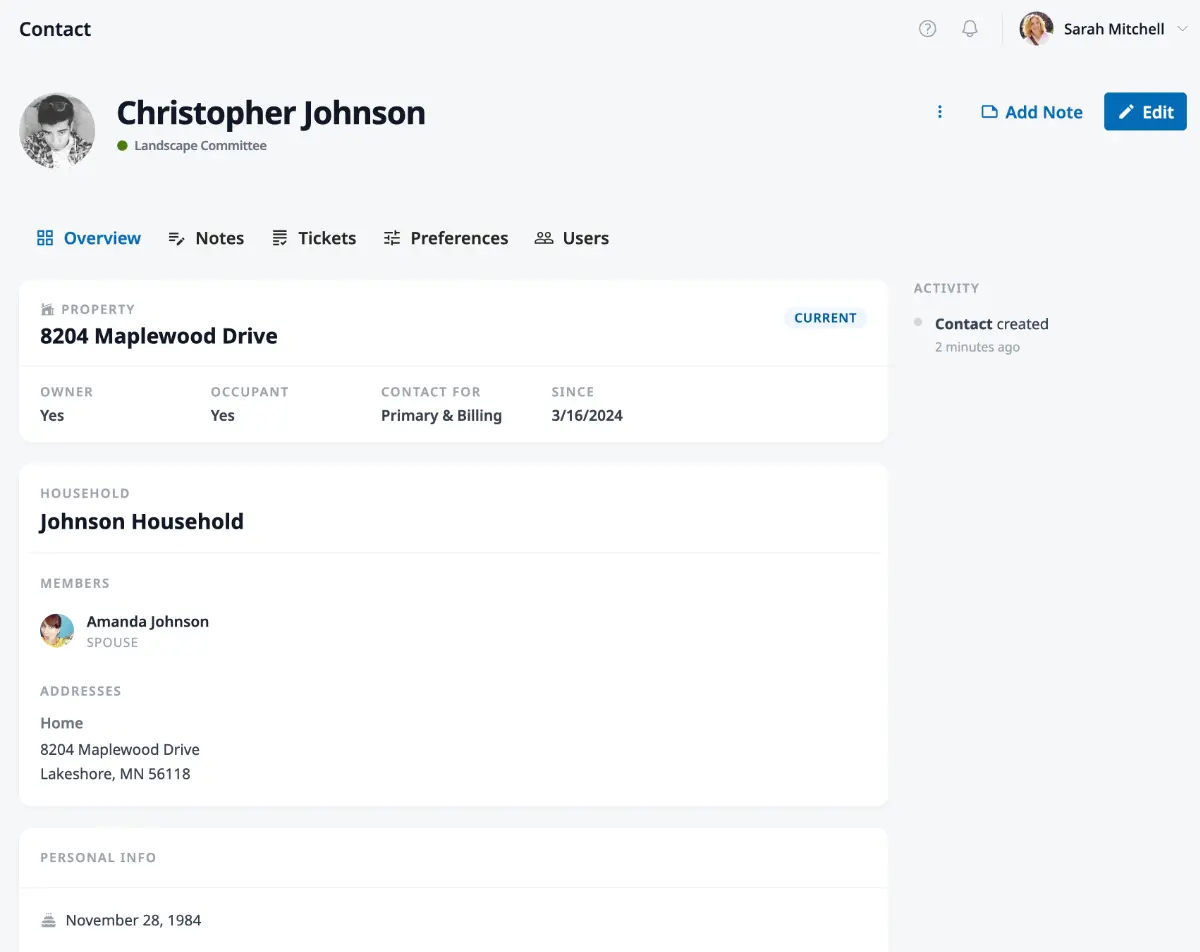
The header shows the contact’s name, photo, company (if any), and groups, with the ⋮ menu, Add Note, and Edit on the right. Below it, five tabs:
- Overview — property links (owner, occupant, primary contact, dates), household, company, and personal details like birthday, phone numbers, and email addresses. The Affiliations card adds a property, company, or household that isn’t linked yet. The Activity list on the right records changes to the contact.
- Notes — internal notes. Click Add Note to write one. Everyone who can open the contact page sees them: Owners, Admins, and Board Members. Residents never do.
- Requests — requests the contact submitted, with their subject, number, status, and dates.
- Preferences — the contact’s timezone, Directory privacy, and notification choices.
- Users — the logins linked to this contact. Click Invite User to invite someone to manage it; see Managing Users.
Set a contact’s Directory privacy
Section titled “Set a contact’s Directory privacy”Each contact decides what other residents see about them in the Directory. For a contact without a login, or one who asks you to do it, open their Preferences tab:
- Turn off Show in the Directory to hide them from residents. They disappear from the People tab and their property’s Units card for residents; Owners, Admins, and Board Members still see them.
- Check Preferred email, Alternate email, Preferred phone, or Alternate phone to choose what goes on their contact card.
Click Save Preferences. A change to what residents see is recorded in the contact’s Activity list, with who made it. Boxes nobody has changed follow the association’s default, which you set under Contact details in HOA Settings.
Organize contacts into groups
Section titled “Organize contacts into groups”Groups are colored tags, like “Board of Directors” or “Welcome Committee”. They show next to names in the Directory and on contact cards, and residents can filter the Directory by group.
On the People tab of the Directory, click Groups. To add one, enter a Group Name, pick a Color, and click Add. Click the pencil icon next to a group to rename it or change its color, then click Save.
To change a contact’s groups, open their page, click Edit, and add or remove groups there.
Manage property links
Section titled “Manage property links”On the contact’s page, open the ⋮ menu and choose Edit Properties. The Properties dialog lists every property linked to the contact, marked Current, Future, or Former.
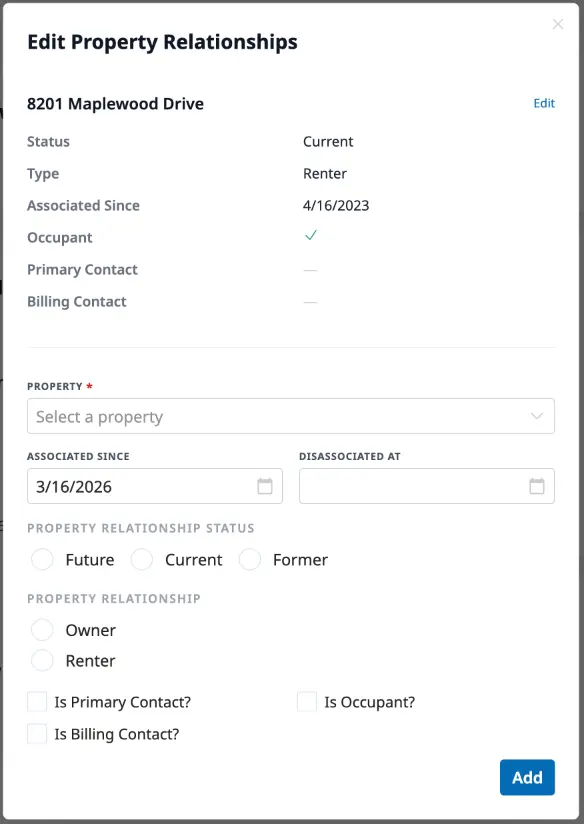
Click Move in to a property to link a new one. Pick the Property and the Move-in date, choose Owner or Renter, and set Primary Contact and Occupant. If the property already has an owner, choose whether to move them out first or add this contact as an additional owner; when the property has an open balance, you also choose how to resolve it. Review the summary and click Confirm Move-In. A move-in date in the future marks the link Future until that day.
Each property in the list has its own ⋮ menu:
- Edit details — change the Start Date, End Date, Primary Contact, and Occupant, then click Save
- Move out — end a current link, now or on a future date, and click Confirm Move-Out
Households and companies
Section titled “Households and companies”Open the ⋮ menu on the contact’s page:
- Add Household or Edit Household — set the Household name, add members with their Relationship (spouse, child, parent, and so on), and manage the household’s addresses. Click Update.
- Add Company or Edit Company — set the Company name, Business Phone Number, and Company Tax ID Number, add members with their Role/Title, and manage addresses. Click Update.
Household members who are listed in the Directory show on each other’s contact cards.
Merge duplicate contacts
Section titled “Merge duplicate contacts”When the same person appears twice, open one of the two contacts, open the ⋮ menu, and choose Merge Contact. In the Merge Contacts dialog, pick the other contact under Contact, then choose a direction:
- replaces — this contact’s details replace the other contact’s
- replace with — the other contact’s details replace this one’s
Click Merge. You end up on the merged contact, which also gets the requests, property links, and groups of both.
Delete a contact
Section titled “Delete a contact”You can delete a contact that was added by mistake, as long as nothing depends on it: no property link of any kind, no login now or in the past, no unanswered invitation, and no requests, drafts included. Open the ⋮ menu on the contact’s page and choose Delete Contact, then confirm with Delete. The option doesn’t appear for a contact that doesn’t qualify; for a duplicate, merge it instead.
Deleting can’t be undone. The contact’s notes, group memberships, and photo go with it, and so does its household or company when it was the last member. You return to the Directory.
Where to go next
Section titled “Where to go next”- Looking at the Directory the way residents do? See Finding Your Neighbors.
- Choosing what residents see by default? See HOA Settings.
- Giving a contact a login? See Managing Users.
- Adding many contacts at once? See Importing Your Data.