
Managing Variances
A variance is a formal exception to a community rule — for example, allowing a homeowner to build a fence that exceeds the standard height limit, or approving an exterior color outside the approved palette. Variances are tied to a specific property and often come with conditions and a compliance deadline.
View variances
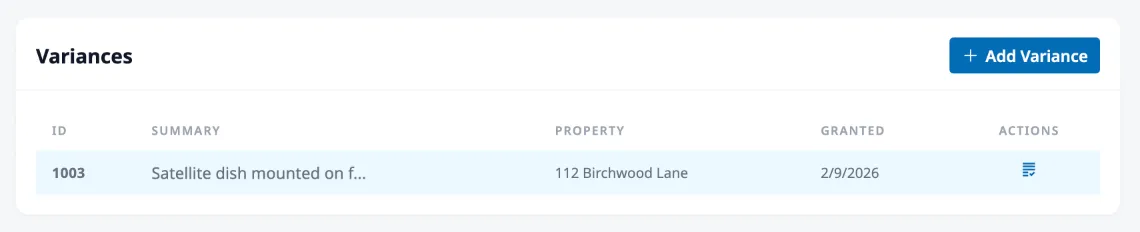
Section titled “View variances”Variances are managed from the property’s page. Go to HOA → Properties, open a property, and find the Variances card on its Details tab. Each row shows the variance ID, a brief summary, and the date it was granted. Click any variance to view the full record.
Create a variance
Section titled “Create a variance”Click Add Variance on the property’s page. The New Variance drawer opens with the property already chosen.
Enter the Date Granted and a Description of what the variance allows (e.g., “Approved 6-foot privacy fence along the east property line”). Choose the Rule from your Rule Library that the variance makes an exception to, so the record shows exactly which rule the owner may set aside. Add any Conditions the variance depends on (e.g., “Must use materials from the approved list and complete installation within 90 days”), and set the Due Date: the deadline for the property owner to complete the work and file a compliance report. Click Create.
You can also record a variance from an approved request: see Managing the Request Inbox.
Variance details
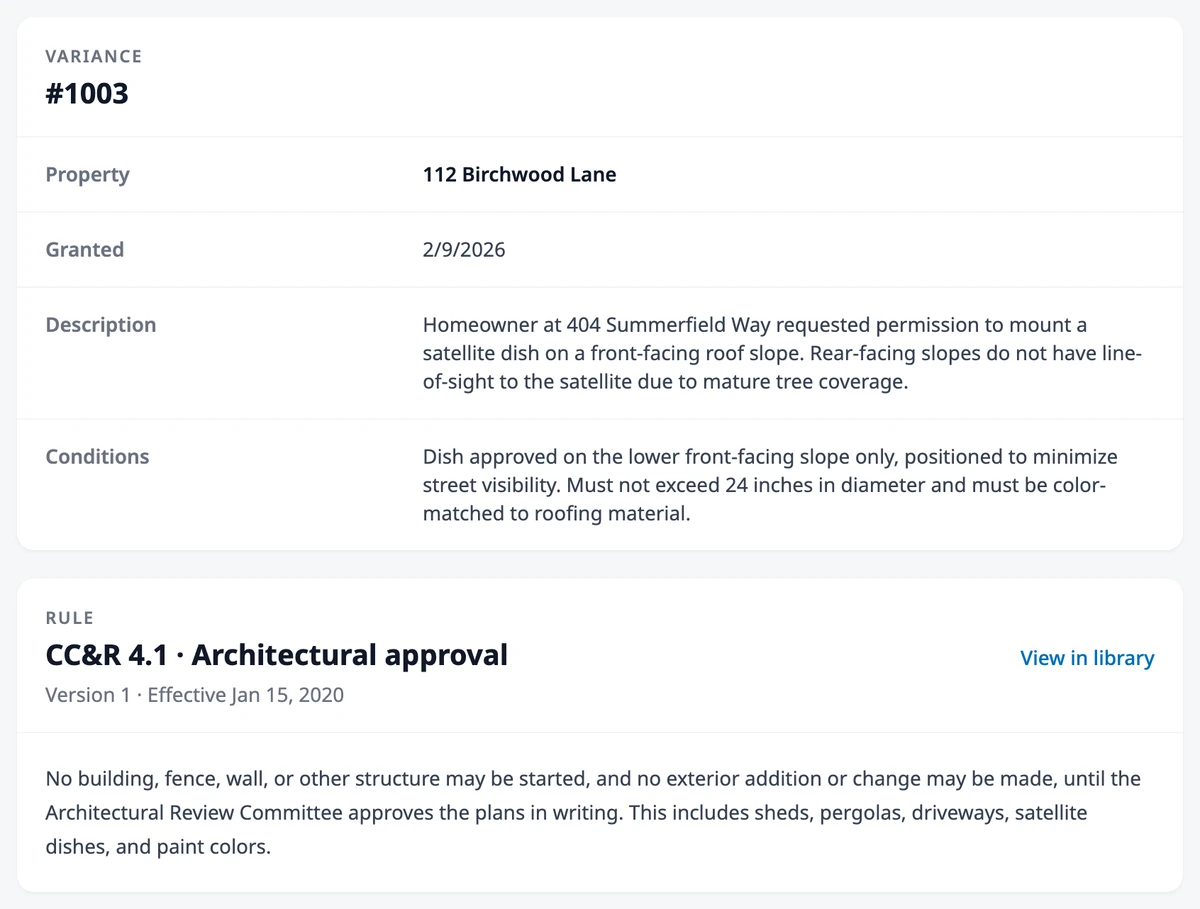
Section titled “Variance details”Click any variance to see the full record: the variance ID, the linked property, the date it was granted, the description, and the conditions. The Rule card shows the text of that rule as it read when the variance was recorded. Once the property owner files a compliance report, an Attachments card shows the photos and files they uploaded, and you can upload more until you accept the report.
Track compliance
Section titled “Track compliance”When a variance is granted, the property owner is expected to complete the work and file a compliance report by the due date. The compliance status appears in the sidebar of the variance detail page and progresses through three stages:
No report filed
Section titled “No report filed”The property owner hasn’t submitted a compliance report yet. The sidebar shows a neutral status indicating no report is on file.
Awaiting acceptance
Section titled “Awaiting acceptance”The property owner has filed a compliance report with a completion date and details about the work. The admin can review the report, look at any uploaded attachments, and decide whether the work meets the variance conditions.
To accept the report, select a Record Acceptance date and click Accept Compliance.
Accepted
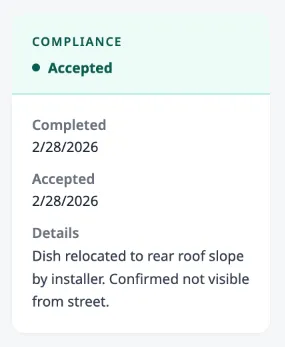
Section titled “Accepted”The compliance report has been accepted. The sidebar shows the completion date, acceptance date, and the details the property owner provided. No further action is needed.
Variance ID settings
Section titled “Variance ID settings”You can customize how variance IDs are generated for your community. Go to HOA → Settings, open the Variances tab, set a Variance ID Prefix and a Starting ID Number, and click Update. For example, with a prefix of “VAR” and a starting number of 100, the first variance is VAR100, the next VAR101, and so on. Each new variance takes the next number after the highest one already in use with your current prefix.
Where to go next
Section titled “Where to go next”- Adding the rules a variance can cite? See Managing the Rule Library.
- Adding the property first? See Managing Properties.
- Approving a homeowner’s request? See Managing the Request Inbox.
- Wondering what residents see? See Viewing Your Property.
- Handling a rule that was broken without approval? See Understanding Violations.