Creating Request Forms
Request forms define what information residents provide when they submit a ticket. You can create different forms for different types of requests — a “Maintenance Request” form might ask for a location and urgency level, while an “Architectural Review” form might need a project date and require board approval.
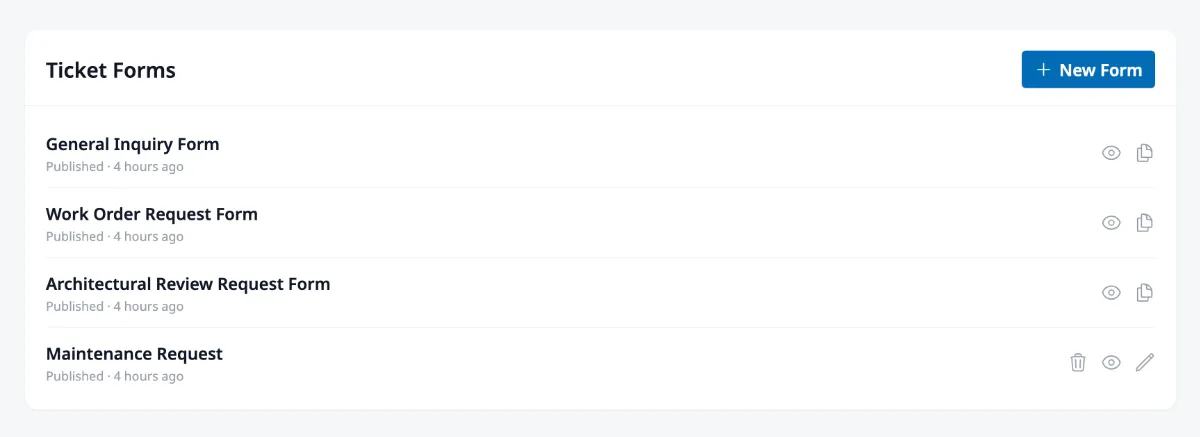
Your community’s forms
Section titled “Your community’s forms”Navigate to Tickets → Forms in the admin sidebar to see all your forms. Each community starts with a default form, and you can add as many as you need.
Creating and editing a form
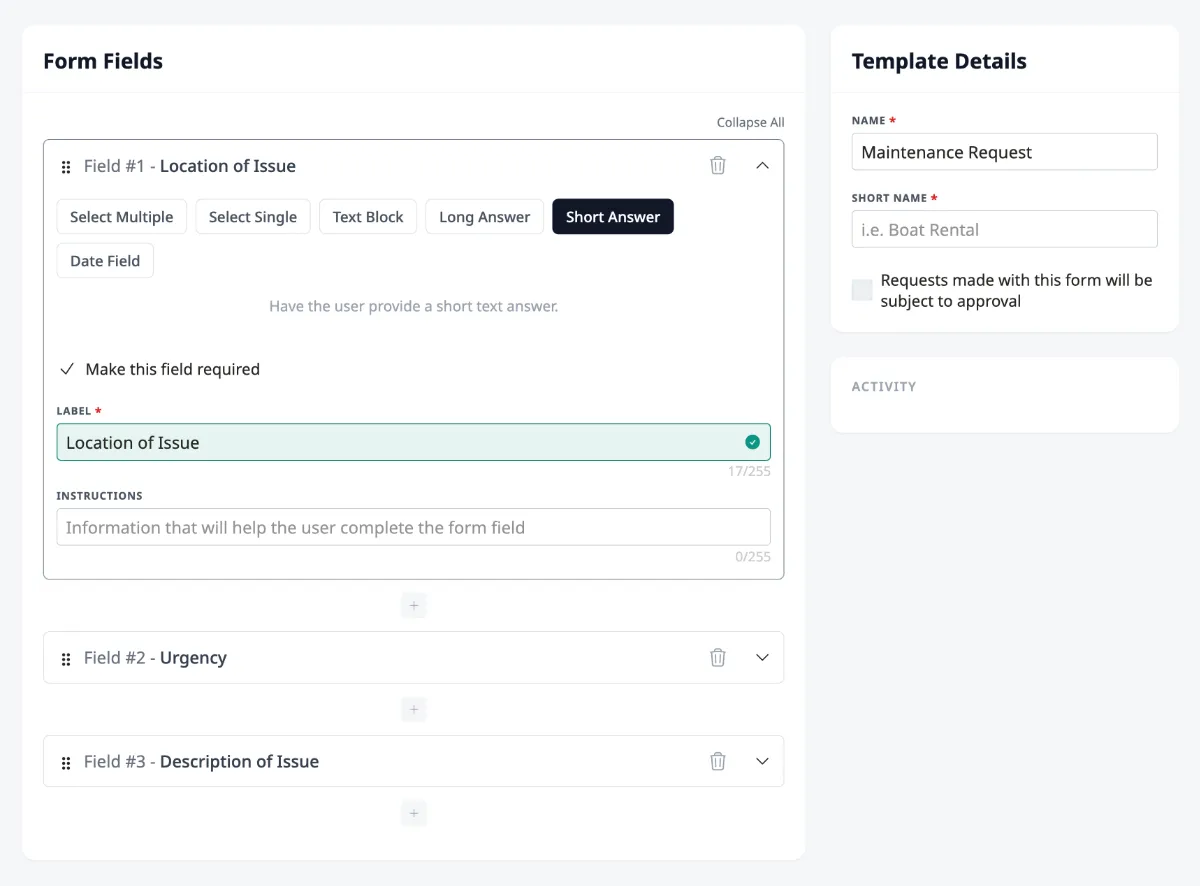
Section titled “Creating and editing a form”Click New Form, give it a name, and you’ll land in the form editor. The editor has two tabs: Fields and Settings.
Building the form
Section titled “Building the form”The Fields tab is where you design what residents fill out. The right sidebar lets you set the form’s Name (the full title residents see), a Short Name (used in filters and lists), and whether the form Requires approval — check this for requests like architectural reviews that the board needs to formally approve or decline.
On the left, you add the fields that make up the form. The available field types are:
- Short Text — A single-line text input (good for names, locations, or brief answers)
- Long Text — A multi-line text area (for detailed descriptions)
- Date — A date picker
- Single Choice — A dropdown with predefined options (like priority level or request category)
- Multiple Choice — Checkboxes for selecting multiple options
- Display Text — Static instructional text that appears on the form but doesn’t collect input (useful for explaining a step or providing context)
Each field can be marked as required, and you can customize its label, placeholder text, and instructions to guide residents.
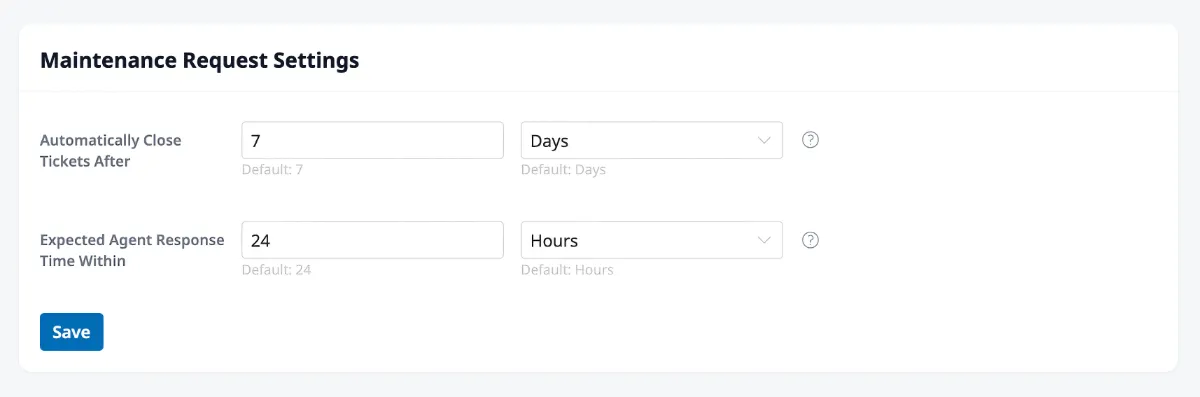
Configuring automation
Section titled “Configuring automation”The Settings tab lets you set up time-based rules that keep tickets from getting stuck. Each setting has a default value that applies to all forms, and you can override it per form:
- Automatically Approve Tickets After — For forms that require approval, if the board doesn’t act within this period, the ticket is automatically approved. This prevents requests from sitting indefinitely. Set a number and interval (hours, days, weeks, or months).
- Automatically Close Tickets After — If a ticket is waiting on a resident’s response (“Response Needed” status) and they don’t reply within this period, the ticket is automatically closed. This keeps the inbox from filling up with stale tickets.
- Expected Agent Response Time Within — If a ticket sits in “Submitted” status beyond this period, agents are prompted to pick it up. This helps ensure nothing falls through the cracks.
Previewing and publishing
Section titled “Previewing and publishing”Click the eye icon at the top of the editor to preview what residents will see when they fill out the form. This is a good way to check that your fields, labels, and instructions make sense from the resident’s perspective.
When the form is ready, use the save button’s dropdown to set its status:
- Draft — The form is saved but not visible to residents
- Published — The form appears as an option when residents create a new ticket