Creating an Event
Admins and authorized board members can create events for the community. Events go through a simple workflow before they’re visible to residents.
Creating a new event
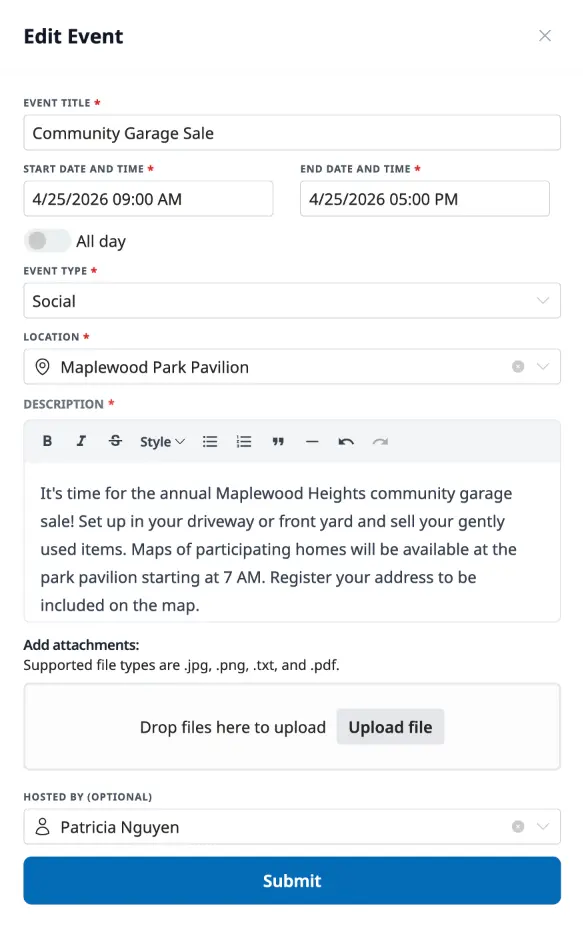
Section titled “Creating a new event”From the Events page, click Add Event in the sidebar. A drawer opens with a form for all the event details: title, start and end dates (or toggle All day for full-day events), event type, location, a rich text description, and optional file attachments. You can also designate a host — if left blank, the event is listed as hosted by the community.
Give your event a clear, descriptive title so residents know what it is at a glance. The description is a great place for logistics like what to bring, where to park, or who to contact with questions.
Drafts and submitting
Section titled “Drafts and submitting”If you’re still finalizing details, click Save Draft to save without publishing. You can come back and edit it whenever you’re ready.
When the event is ready, click Submit. Admins can publish events directly — they go live as Active right away. Board members and other creators submit events as Pending, which means an admin needs to approve them before residents can see them. See Approving & Canceling Events for details on that workflow.
Editing an event
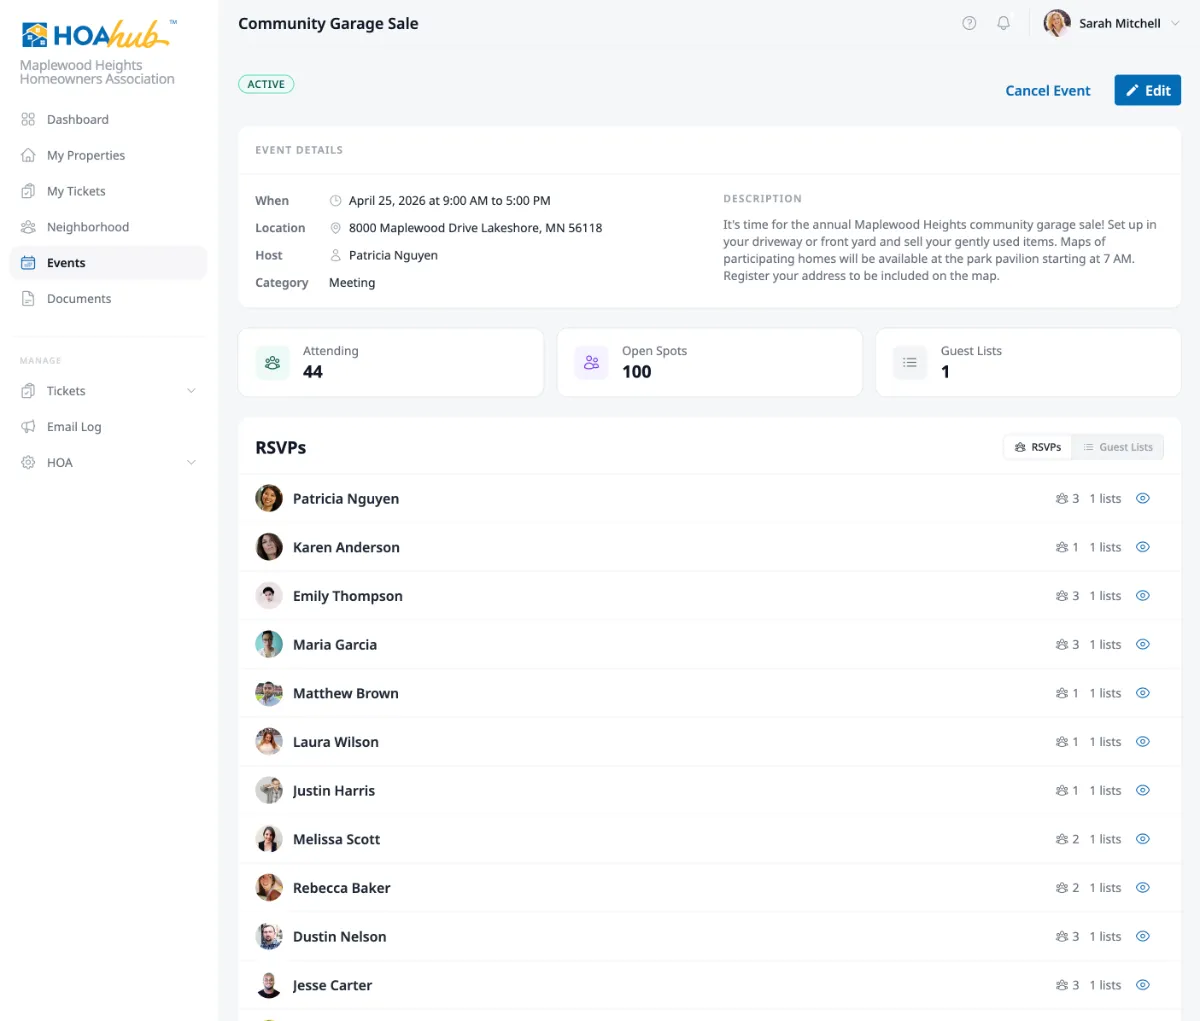
Section titled “Editing an event”Click any event to open its detail page, then click Edit to update any of the details. Changes are saved immediately, and if the event is already active, residents will see the updated information.
Tracking attendance
Section titled “Tracking attendance”The event detail page shows three numbers at a glance: how many people are Attending, how many Open Spots remain, and how many Guest Lists the event has. Below those stats, you can switch between two views — RSVPs shows everyone who has signed up with their guest count, and Guest Lists shows each list individually with its time slot and capacity.
Working with guest lists
Section titled “Working with guest lists”Guest lists let you organize attendance for different parts of an event. A community barbecue might have separate lists for a morning setup shift, the main event, and an evening cleanup crew. Each guest list has its own time window and capacity, so you can track who’s coming to what.
Adding a guest list
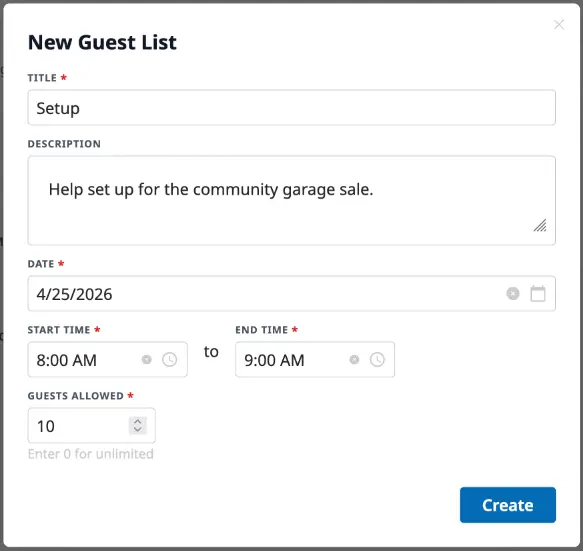
Section titled “Adding a guest list”Switch to the Guest Lists view and click Add. Give the list a title (like “Main Event” or “Setup Volunteers”), an optional description, the date and time window, and a capacity. Set capacity to 0 for unlimited spots.
You can add as many guest lists as you need. Each one appears as a row showing its time range, registered count, open spots, and maximum capacity.
Viewing responses and adding guests manually
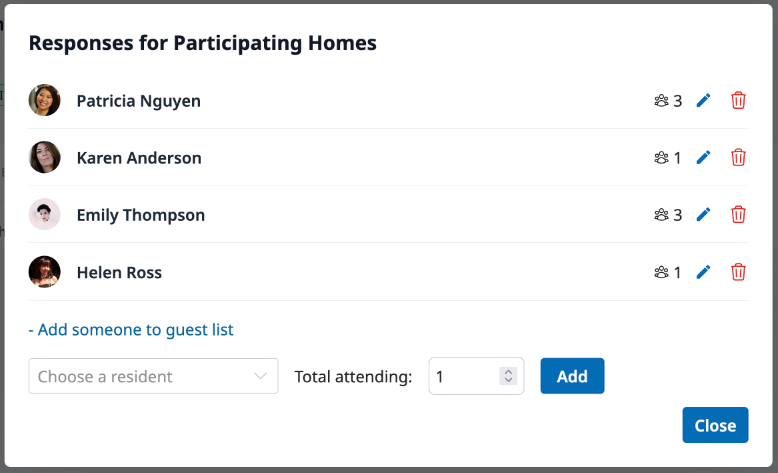
Section titled “Viewing responses and adding guests manually”Click the list icon on any guest list to see who has responded. From this view you can also manually add someone — useful when a resident RSVPs in person or by phone and you want to keep the count accurate. Search for the resident, set their guest count, and click Add.
Editing a guest list
Section titled “Editing a guest list”Click the edit icon next to any guest list to update its title, description, time window, or capacity. Changes don’t affect existing RSVPs.